Sewing Machines
Sewing Machines


Basic Stitches


Explore the Sewing Basics Resource Guide
Check out:
Top 5 Cutting Tools for Sewing - Pg. 12
How to Rip out a Seam - Pg. 24
How to Make a Simple Hem - Pg. 27
How to Sew a Button - Pg. 29
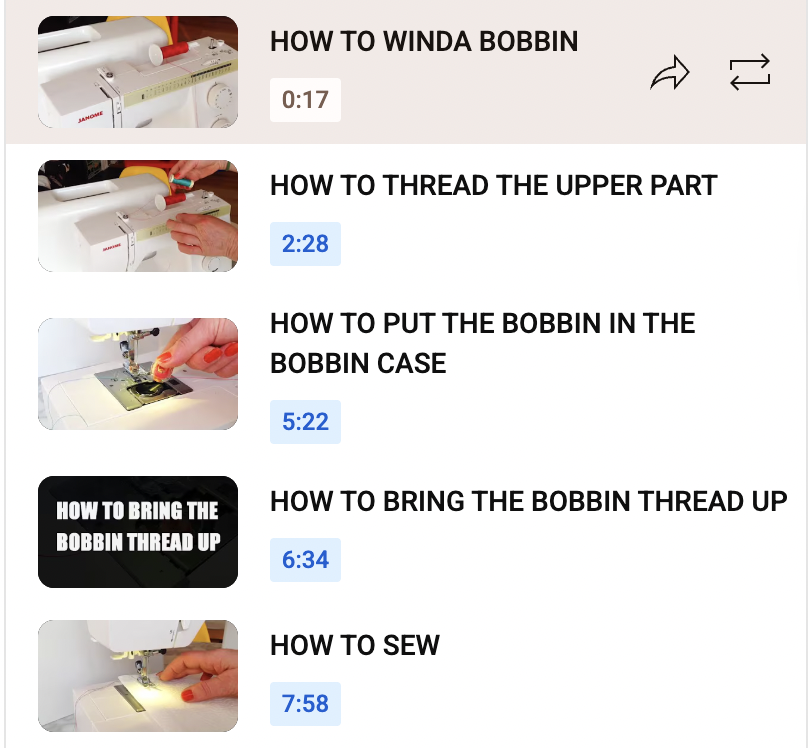
Intro to Sewing Machine Workshop or Review
Properly thread your machine and set it up.
Sew a line with straight stitches, backstitching at the beginning and end
Sew a curved line.
Sew a zig zag stitch.
Sew a corner by pivoting (leaving the needle down, lift up the presser foot and turn your fabric, put the foot down and carry on.
Use the iron to press a double hem and then sew it, enclosing the raw edge.
Practice any of these a few times to get a feel for it.
Take your thread and bobbin out, wind up your power cord and foot pedal and put the lid back on your machine.
Sew on a button to your fabric.
Turn into the In-Bin when complete. Use the tape and Sharpie to put your name on your work. Congratulations! You did it :)

Intro to Sewing Machines Project
For this project, you will have 3 full classes, so choose a project that you can complete in that time. You may have time to complete a series of projects, so keep that in mind as you plan as well.
Project Options:
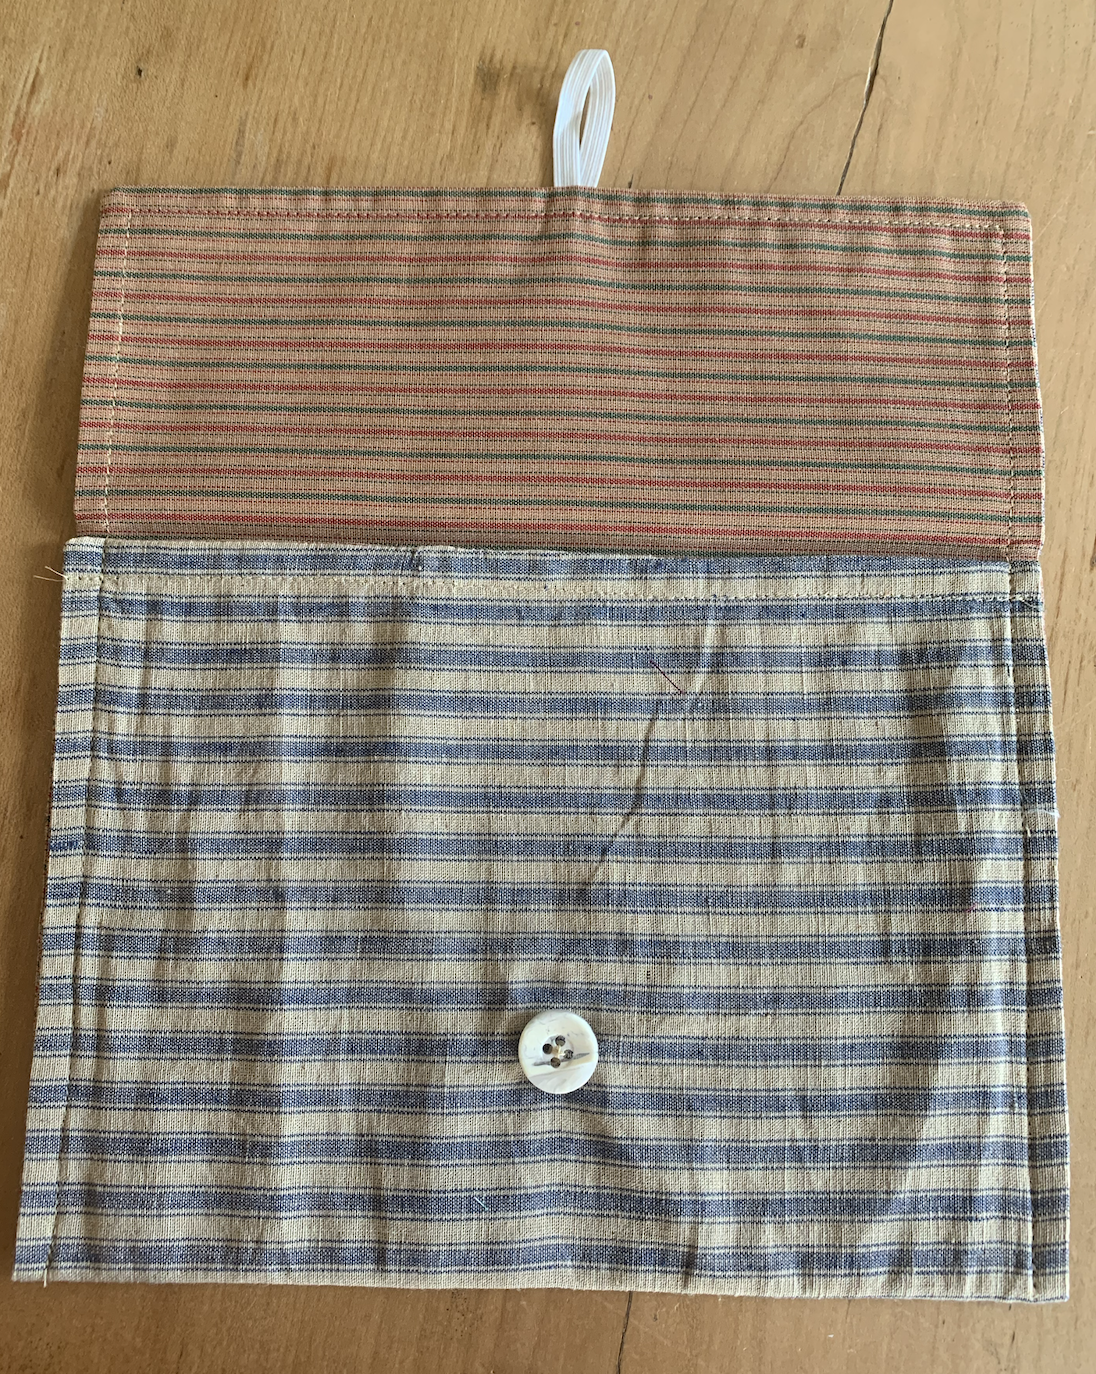
1) Sewing Kit Bag (encouraged for beginner sewists)
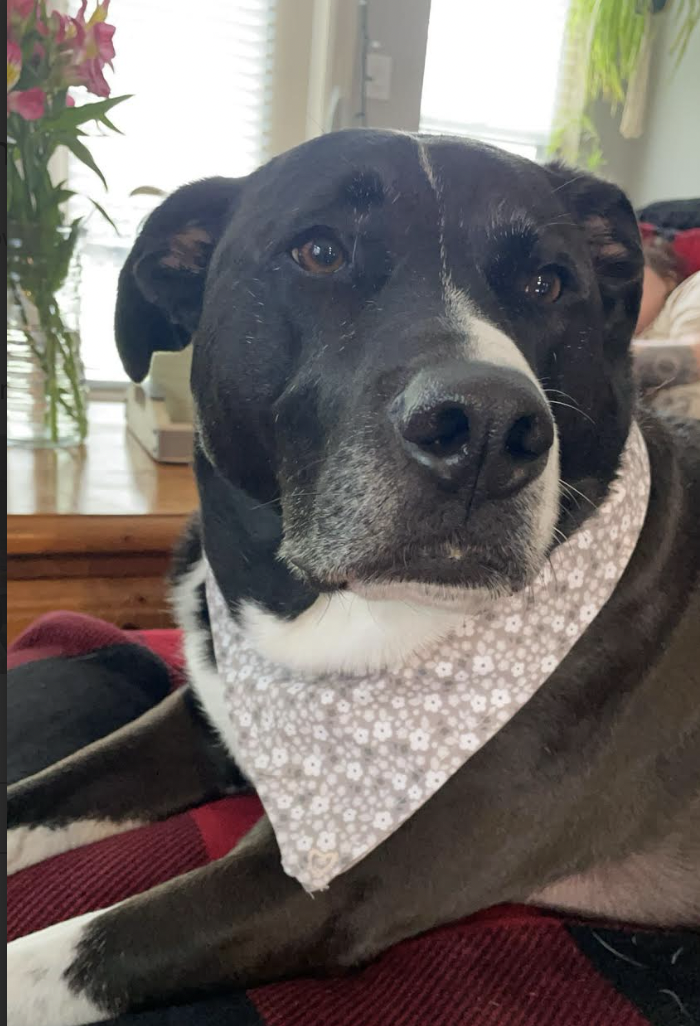
2) Dog Bandana
3) Upcycling Using a Sewing Machine
4) A small-scale sewing project of your choice
(A free pattern is preferred, although you can self-draft your pattern if you choose)
Process:
Start by completing a Project Proposal paper. Select a project you will be able to complete in class time.
Next, conference with Ms. Nethery before you begin.
Use your class time to complete your project, making adjustments as necessary. Ask for help whenever you need it.
Submit a photo and your project, along with your reflection at the end of the unit.


Tips for Cutting Fabric

If you aren’t sure, just ask!
Do NOT waste fabric. Carefully consider how to pin all your pattern pieces to the fabric, using as much as possible and minimizing waste.
Some fabrics have a RIGHT SIDE and a WRONG SIDE. Make sure you are pinning your pattern to the right side or following the pattern instructions.
Make sure your fabric is flat; if not, you may need to iron it before you cut it.
After you have pinned your pattern to your fabric, do a rough cut of each pattern piece and then do a more precise cut.
Some patterns will tell you to fold your fabric and then cut. Make sure you are placing your pattern piece correctly before you begin.
If using the rotary cutters, make sure you have a cutting mat down before you begin.
Move the fabric and your body to get the easiest angle to cut.
Clean up after yourself as you go.