Shibori
Shibori
Definition:
Shibori is a Japanese manual resist dyeing technique used on textiles to create patterns that spread unevenly across the fabric.
The resulting patterns are often emblematic of Japan’s appreciation of the beauty of imperfection – known locally as wabi sabi – and are prized for their individuality and arresting beauty.

The term comes from the Japanese word "shiboru," meaning to wring or squeeze.
Shibori is characterized by the various ways of binding, folding, twisting, or compressing cloth to create areas that resist dye, resulting in unique and often intricate patterns.


Indigo Dye
Traditionally, shibori dyeing uses a specific dye called Indigo.
This dye is a deep, rich, beautiful blue.
History of Shibori
Shibori has ancient roots in Japan, with some techniques dating back over 1,000 years.
It developed as a way to create patterns on fabric using simple tools and materials.
Traditionally, indigo was the most commonly used dye in shibori, though other colors were also employed.
Shibori techniques spread throughout Asia and eventually to other parts of the world.
In the 1960s, there was renewed interest in shibori in the West, often compared to tie-dye techniques.
Shibori Techniques
Kumo
Means: Cloud
Technique: Twist the fabric into tight points, and secure with string. This may be done several times across the surface of the same piece of fabric.


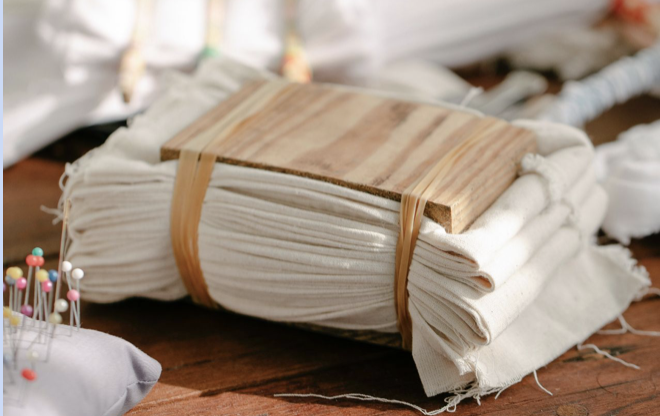
Itajime
Means: Board claming
Technique: the fabric is folded and then secured between wood pieces before being dyed.


Nui
Means: Sewing
Technique: the fabric sewn in lines or designs and the small folds created between each stitch create the dye resisted areas.


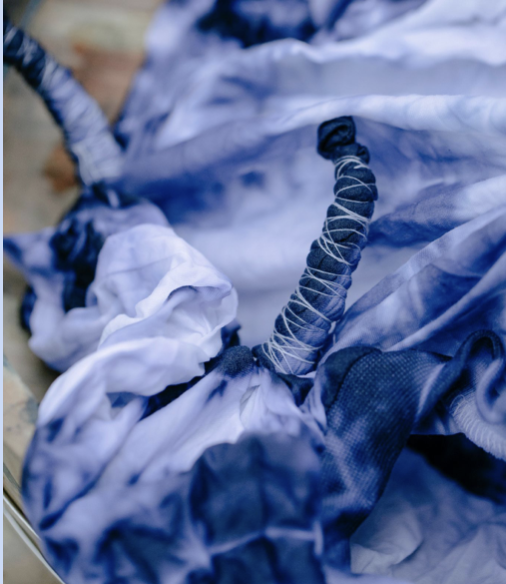
Arashi
Means: the storm
Technique: the fabric is wrapped around a pole, scrunched together, and secured with string.


Shibori Experimentation Workshop
Cut 4 - 5x5 inch squares from the scrap fabric pile. Use the rotary cutter and a ruler or fabric scissors. Try to reduce any scraps.
Select 4 different shibori techniques to experiment with. Use the resources linked here or find some of your own.
Try at least 2 shibori techniques using stitching. You can try to get creative by selecting patterns such as stars or hearts.
When you have your test pieces ready to dye, we will meet at the dye station to learn about the dye process.
Useful Website and Tutorials


How to Dye - Dye Process
Once your test pieces are ready, come back to the sink area and show your pieces to Ms. Nethery before you begin.
Soak your pieces in water for 1-2 minutes until they are thoroughly wet. Then wring out any excess water to the best of your ability.
Put on rubber gloves and using the utensils, gently lower your test pieces into the dye bath.
Leave your items in the dye bath for approximately 1-2 minutes, gently stirring as you go. This time may change depending on the colour you are trying to achieve.
Gently take your items out of the dye bath and try to squeeze out existing dye. Place items on a tray. Use the tray to move your items to a spot on the counter. Using the green tape, label your items.
Let your items sit for approximately 24 hours to fix the dye before cutting open to reveal your designs.
Shibori Sewing Project
For this round of Design Thinking, you will create a project that uses a combination of:
Shibori Dye Techniques
A PDF Pattern or self-drafted pattern
Sewing machine and finished edges
I have four potential projects that you could choose from, but you can also select a project of your choice, but you must have a pattern. Within each option, there are many potential variations that you can make to personalize your project and use design thinking based on your aesthetic preferences and user needs.
Apron (easy to medium difficulty)
Tote Bag (easy to medium difficulty)
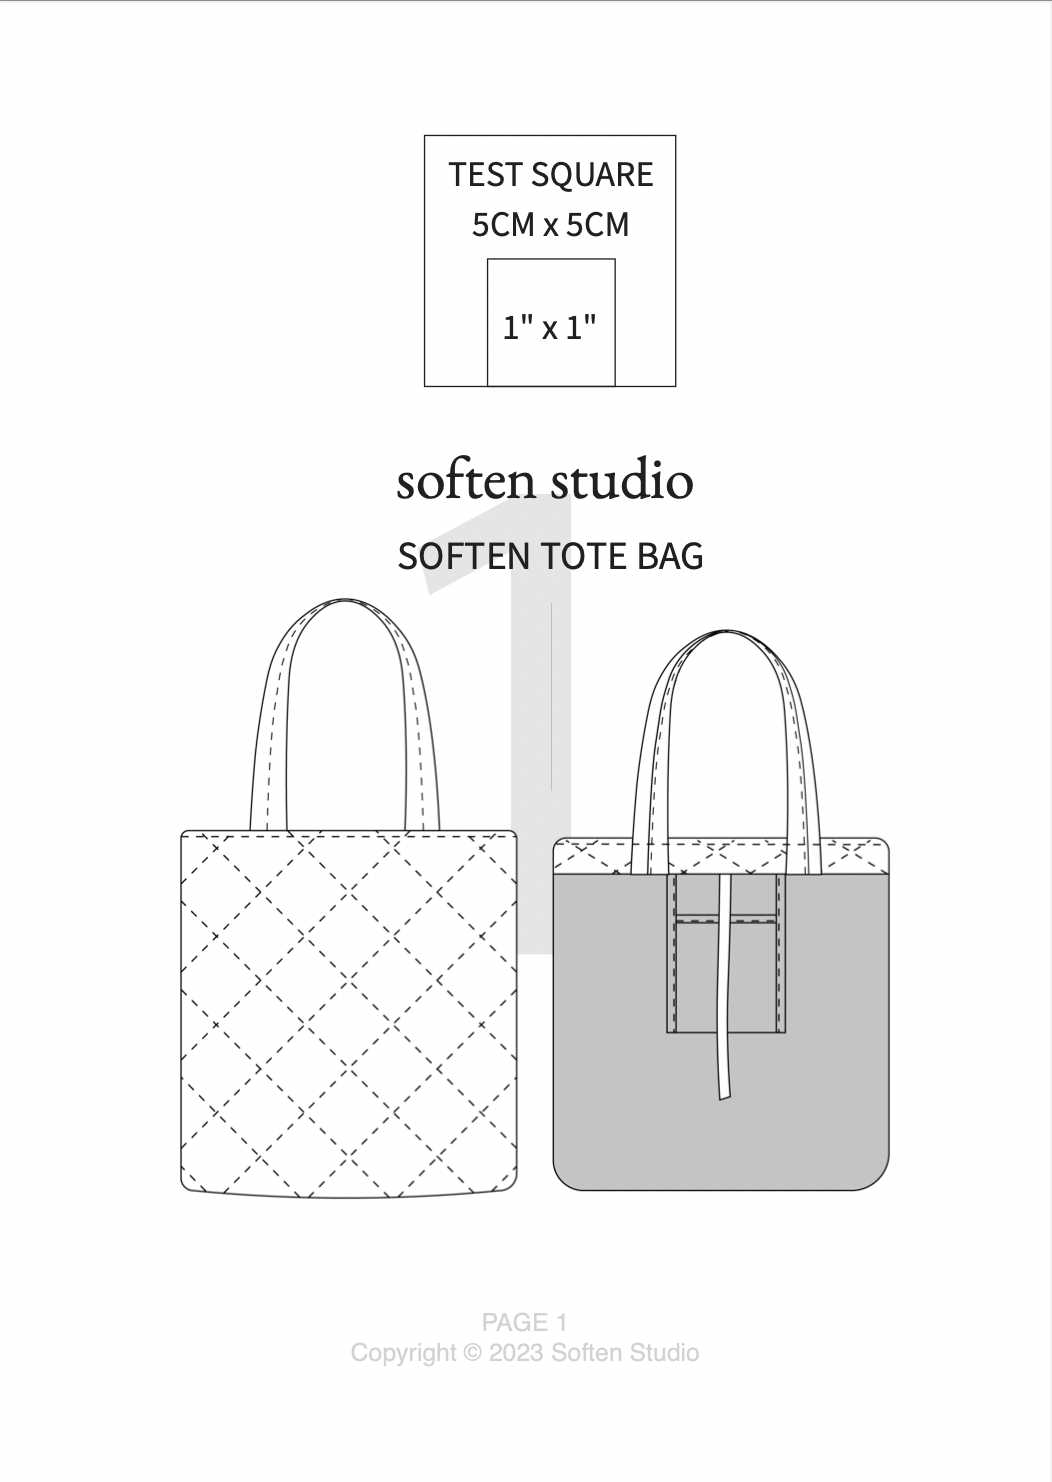
Soften Mini Tote (options to quilt and add a lining, medium to difficult)
Dog Bandanna (easy)
Steps and Technique Overview
Assemble your pattern
Pin pattern to fabric
Carefully cut out your pieces
Shibori dye each piece separately
Follow your pattern to sew together your project and add finishing touches
Design Thinking Process
Project Proposal
Complete your project proposal and include details about how you will customize your project.
Conference
Once your project proposal is complete, conference with Ms. Nethery to get your project approved and receive your materials.
Studio Time
Use studio time wisely to finish your project in class. You may have some down time while your project is drying from the dye. You can work on your Friday projects during that time.
Reflection + Project Submission
Complete the reflection and self-assessment to share any design thinking challenges, triumphs and pivots that took place. Turn in your project in person and on Google Classroom.


Understanding Patterns
Tips and Tricks
PDF Patterns usually come in two sections.
There will be an instructions section, and then there will be a printable pattern that you can put together.
Most patterns will include a measurements section, where you can determine what size of the garment or item you would like to make. Better to error on the size of something being too large than too small.
Always print the test sample first to ensure it’s on the right settings. Usually, there will be a 2-inch by 2-inch square that you can then measure to ensure the accuracy of your pattern.
Put your pattern together, being careful to line up the edges as best you can and tape together.


Follow the instructions in the pattern. If you can find a pattern in a YouTube video that can also be helpful for hard-to-understand areas.
Don’t be afraid to improvise and use design thinking to make alterations based on your needs.
Depending on your skill level, select patterns that you feel excited about and that aren’t too complicated.
Trust the process. Sometimes what the pattern is asking you to do seems counterintuitive, but keep going and things will often work out. If they don’t you can always take out your seams and start again. You’ll have learned a lot in the process.
Find a pattern designer that you like. Social media is an amazing resource and many pattern designers have cult followings. You can also search specific hashtags to see the items that people have made using that pattern. For example, Syd Graham’s Lane Pants has a very large following across all platforms.
How to Sew a Double Hem
Most of the patterns use a double hem.
Be sure to take the pins out before you go through the machine.

Success Criteria
Define and Empathize
I’ve identified a target audience for the project.
I can explain how this product meets my target audience’s needs, doing research if needed.
Plan
I came up with a creative idea(s) for my project proposal.
I planned materials and textile techniques that were creative and met the user’s needs.
I made a plan for my time so that each block was used efficiently.
I considered if my idea matches my skill level or requires skills I am able to learn.
Prototype and Test
I tested a prototype to try out different tools and materials.
I considered any changes or improvements I needed to make based on my prototype and/or feedback I received.
Make and Implement
I was able to successfully complete my final product.
I used the right tools and materials that matched my project and my skills.
What I planned for matches my final product. If there are changes, I can explain why.
I kept the shared space tidy by putting away my tools and materials properly.
Share and Reflect
I can reflect on my entire design thinking process, taking note of any changes I made and/or what I would do differently next time. This allows me to set goals for the future when necessary.
Evaluate
I can consider what impacts my design choices, such as my culture, place, resources, and tools that are available to me.
I can evaluate how designers’ choices might have personal, social, and/or environmental impacts.