
Sewing Part Two
〰️
Sewing Part Two 〰️
For this unit, you will have 4 classes to complete a sewing project of your choice.
We will follow the design thinking process, as we have been doing all semester: plan, conference, create, reflect and submit.
Project Criteria:
Must use a pattern (can be self-drafted).
No raw edges - must properly finish edges.
You can quilt or upcycle as well.
Choose something that is realistic for you to complete in 4 classes, challenge yourself, but not so much that it isn’t fun anymore.
Come to your conference with the following: Project Proposal, Material Selection, Pattern Selection, and Instructions. Be sure to have read your instructions and be able to explain what you will do.
Do not pick a project you do not understand or will have to ask me what to do step by step. Part of this is learning how to read patterns as well. See tips below.
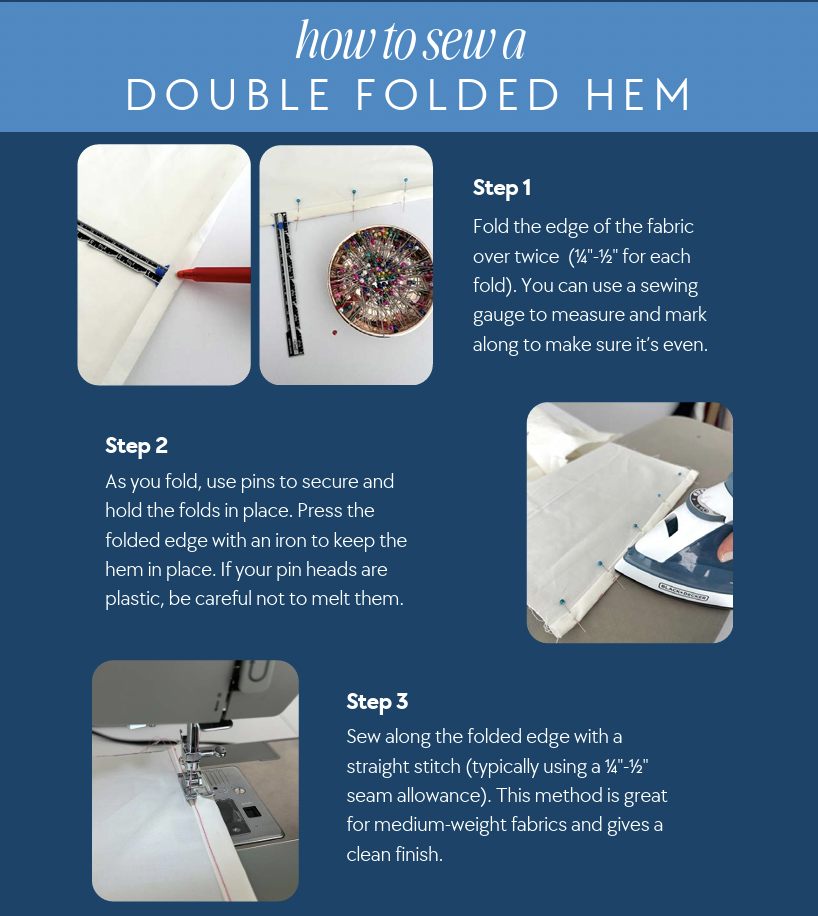
Finishing Edges: Your project should not have any raw edges on it. You will need to follow your pattern to ensure that all of your edges are enclosed. You can use the serger, a zig zag stitch, a double-folded hem, a French seam or another option of your choice.
Stay Organized
Your pattern will include 2 or more parts:
1) Instructions and 2) Pattern that will need to be taped together to be cut out. You may have to draw your pattern depending on the source of your project inspiration.
Keep your papers organized and use both.
Pin your pattern to your fabric according to your instructions. Double-check before you cut. Do NOT waste materials.
Mirroring: Flipping a shape or pattern to create a matching opposite side so both sides are the same.
If you do not mirror, one side will be inside out.
Seam allowance: The space between the stitching line and the raw edge of the fabric. It is the part you sew on and don’t see.
Follow the seam allowances for your pattern, every pattern will be different, but this will ensure you are making the proper size.
Key Concepts
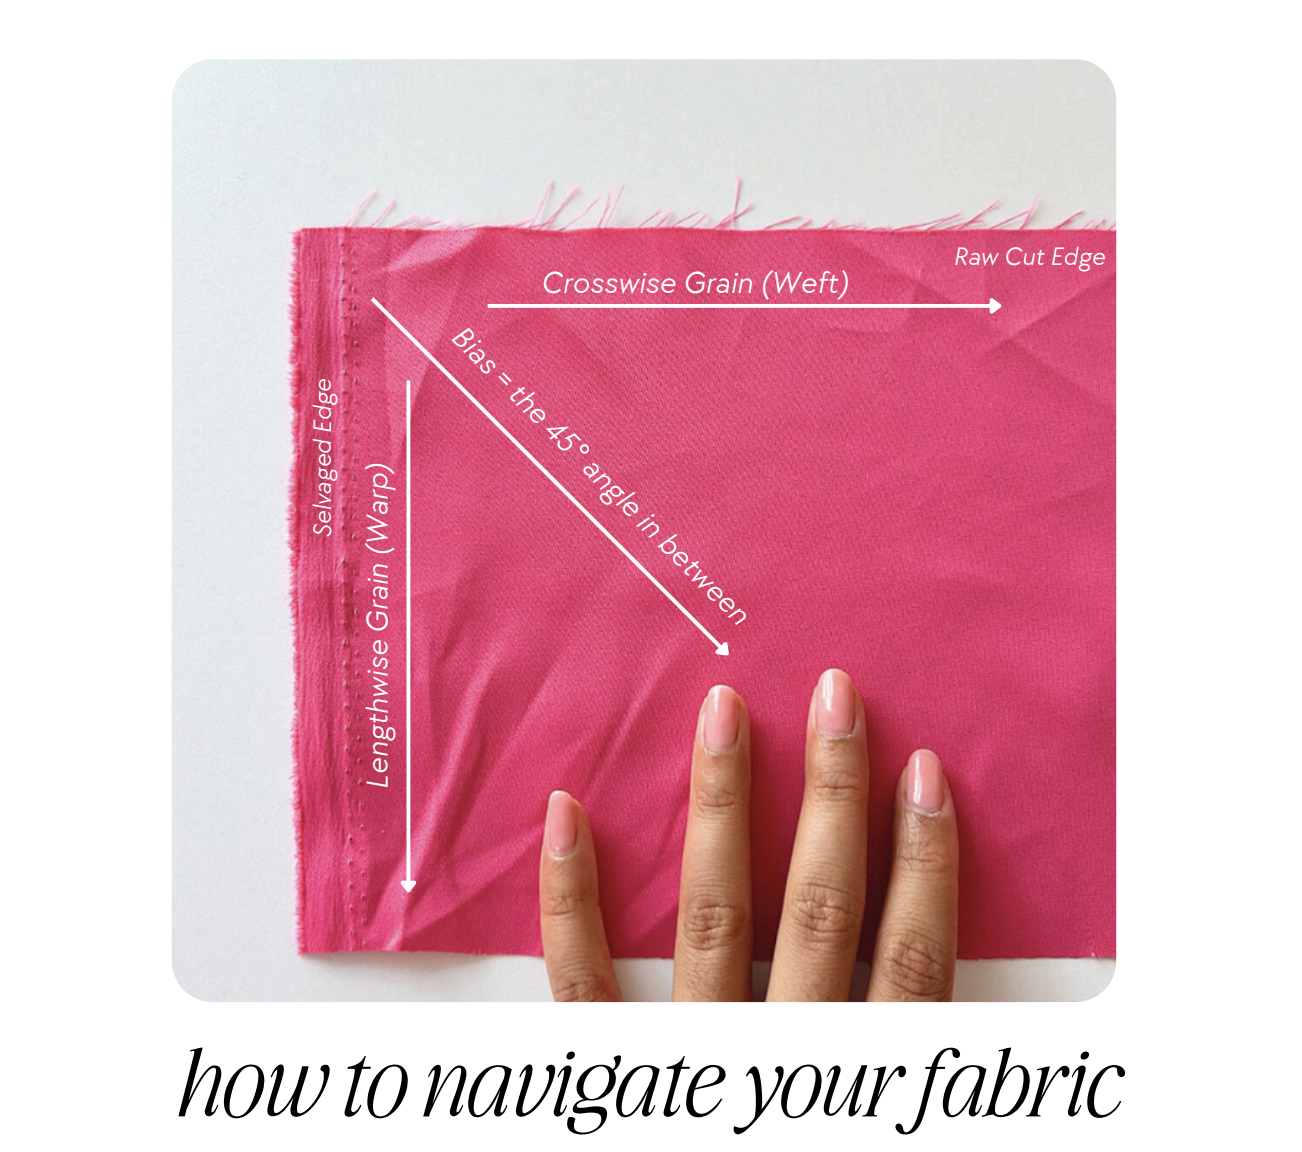
Understanding Fabric: Examine your fabric selection first and make sure you lay it out properly before you cut. Some patterns will tell you how to place the pattern on the fabric for best results.
Raw edge: The cut edge of fabric that can fray.
Selvedge edge: The finished edge of fabric that won’t fray (the sides from the store).
Bias: The diagonal direction of fabric that stretches the most.
Lengthwise grain: The direction that runs along the length of the fabric; it stretches the least.
Crosswise grain: The direction that runs across the width of the fabric; it has a little stretch.
Right side of fabric: The front side of the fabric that is meant to be seen.
Wrong side of fabric: The back side of the fabric that is usually not seen.
Project Options
-
![]()
Apron
Beginner Friendly
- Can embellish if extra time.
-
![Beginner / Intermediate]()
Pajama Mini Shorts
Beginner / Intermediate Project
- Can add elastic waist or drawstring option.
-
![]()
Trevor Unisex Pajama Pants
Beginner Friendly
- Clastic waist band or draw string options.
- No pockets.
-
![]()
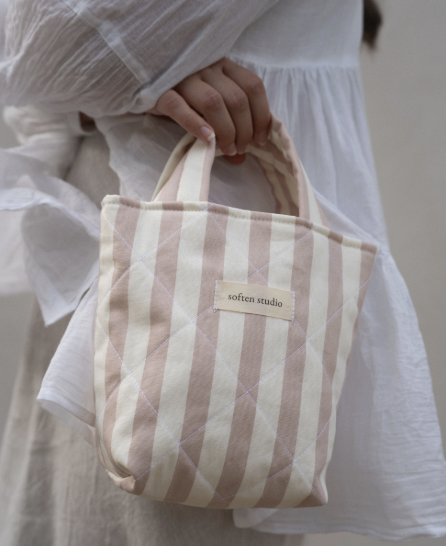
Soften Mini Tote Bag
Many options to customize this project:
- Can be quilted or not quilted
- Can add customizations on bag: applique, embroidery, block print, fabric painting, depending on time.
-
![]()
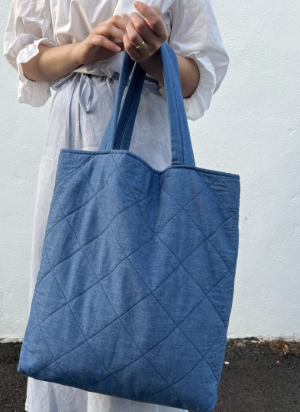
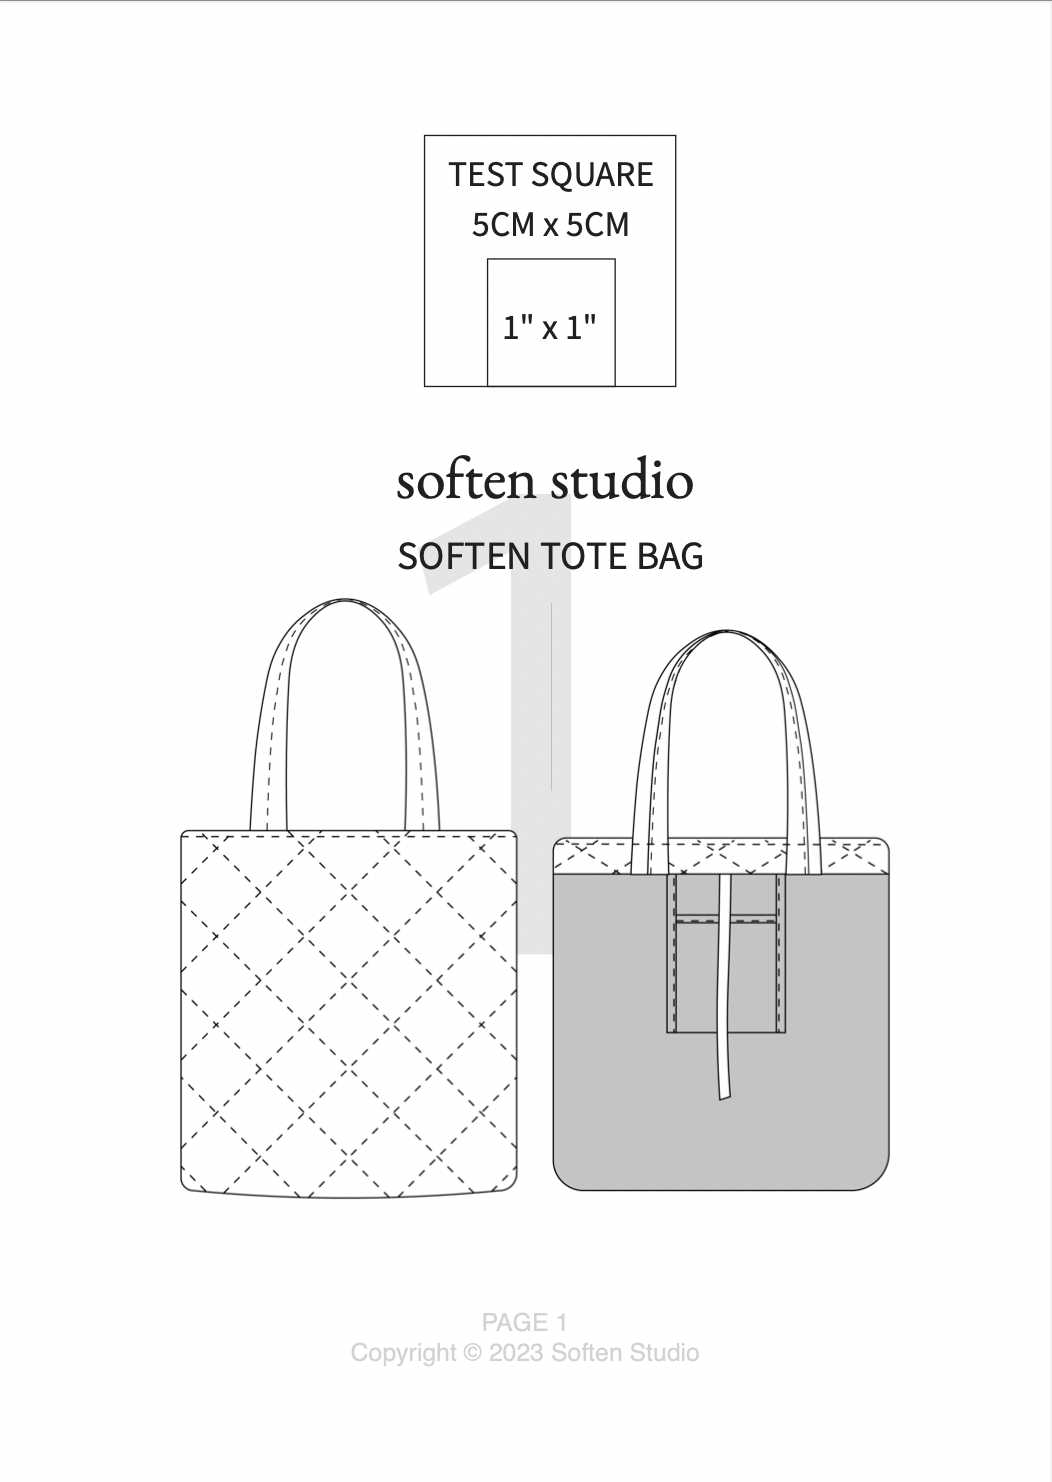
Soften Tote Bag
Many options to customize this bag.
- can be sewn with or without a lining
- can be customized with applique, block print, fabric painting, etc.


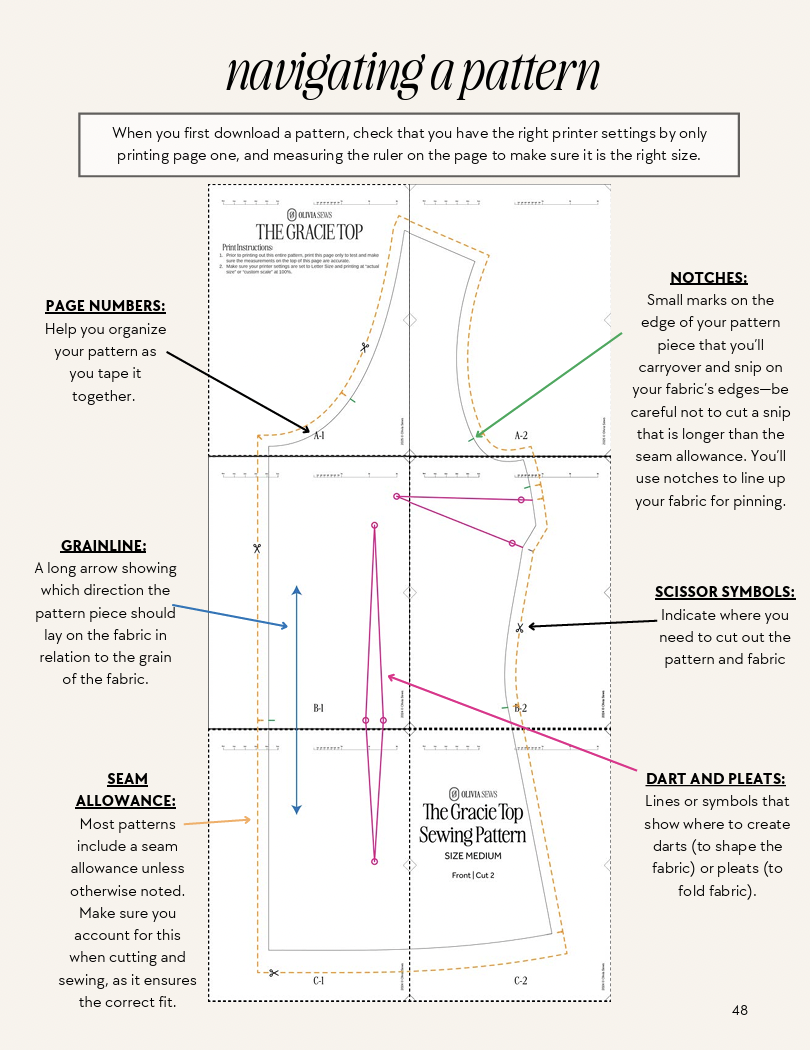
Understanding Patterns
Tips and Tricks
PDF Patterns usually come in two sections.
There will be an instructions section, and then there will be a printable pattern that you can put together.
Most patterns will include a measurements section, where you can determine what size of the garment or item you would like to make. Better to error on the size of something being too large than too small.
Always print the test sample first to ensure it’s on the right settings. Usually, there will be a 2-inch by 2-inch square that you can then measure to ensure the accuracy of your pattern.
Put your pattern together, being careful to line up the edges as best you can and tape together.


Follow the instructions in the pattern. If you can find a pattern in a YouTube video that can also be helpful for hard-to-understand areas.
Don’t be afraid to improvise and use design thinking to make alterations based on your needs.
Depending on your skill level, select patterns that you feel excited about and that aren’t too complicated.
Trust the process. Sometimes what the pattern is asking you to do seems counterintuitive, but keep going and things will often work out. If they don’t you can always take out your seams and start again. You’ll have learned a lot in the process.
Find a pattern designer that you like. Social media is an amazing resource and many pattern designers have cult followings. You can also search specific hashtags to see the items that people have made using that pattern. For example, Syd Graham’s Lane Pants has a very large following across all platforms.
Tips for Cutting Fabric

If you aren’t sure, just ask!
Do NOT waste fabric. Carefully consider how to pin all your pattern pieces to the fabric, using as much as possible and minimizing waste.
Some fabrics have a RIGHT SIDE and a WRONG SIDE. Make sure you are pinning your pattern to the right side or following the pattern instructions.
Make sure your fabric is flat; if not, you may need to iron it before you cut it.
After you have pinned your pattern to your fabric, do a rough cut of each pattern piece and then do a more precise cut.
Some patterns will tell you to fold your fabric and then cut. Make sure you are placing your pattern piece correctly before you begin.
If using the rotary cutters, make sure you have a cutting mat down before you begin.
Move the fabric and your body to get the easiest angle to cut.
Clean up after yourself as you go.